Blog

7 Best Ways to Trim Under an Exterior Door?

A poorly fitted exterior door can invite cold air, rain, insects, and rising energy bills. The gap beneath it may look minor, yet it often reveals a deeper problem. The threshold might be loose. The door slab may have shifted. The floor could be uneven. Before choosing a trim method, inspect the entire doorway carefully.

Veteran contractor Tom Silva offers a practical reminder: “Seal the gap, but never hide a movement problem.” That advice matters when you trim under exterior door openings. A neat strip of wood cannot correct a sagging frame or damaged threshold. It may only conceal the warning signs. Sometimes, the best repair is slower than expected.

This guide explores seven workable ways to create a cleaner, tighter finish. Options include door sweeps, adjustable thresholds, wooden fillers, PVC trim, exterior-grade sealant, and carefully scribed blocking. Each method suits different conditions. A painted wood filler may work on a sheltered porch. It may fail quickly beside standing water. PVC can resist moisture, but it may look too bright against an older door. Small details matter, including a two-millimeter clearance and a dry, dust-free surface. Wear eye protection when cutting materials. Measure twice. Mistakes still happen. The goal is not perfect appearance alone. A successful trim under exterior door repair should remain sealed, stable, quiet, and easy to maintain through changing weather.
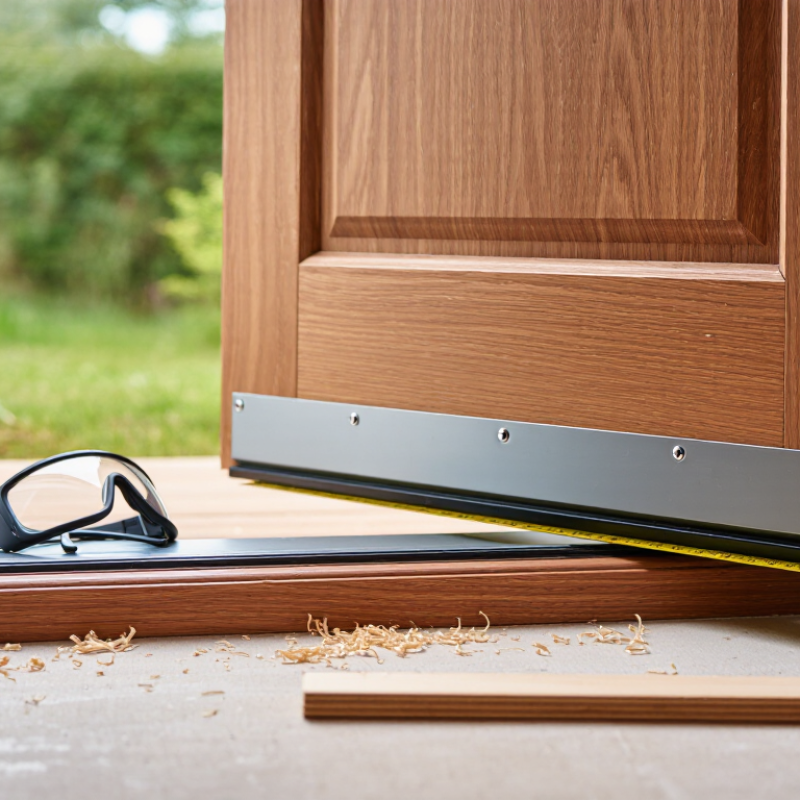
7 Best Ways to Trim Under an Exterior Door?

Assess the Door Gap and Select the Safest Trimming Method

Before trimming an exterior door, measure the gap at both corners and across the center. Use a steel ruler, not eyesight alone. A small gap may come from a sagging door, loose hinges, or an uneven threshold. Check daylight, drafts, and the door’s contact with the weather seal. The safest method depends on the cause, not just the visible opening.

If the slab is too long, remove the door and mark a level cut line on its bottom edge. A fine-tooth saw can create a clean result, but protect the surface with masking tape. Trim small amounts, usually 3 millimeters at a time, and test the fit after each cut. Solid wood doors may tolerate careful planing, while hollow or composite doors can be damaged by deep cuts. Never trim around hinges or hardware without understanding the door’s structure. A neat cut can still weaken the bottom.

Tips: Keep the door supported on padded stands. Wear eye protection and control the saw slowly. Seal any exposed wood after trimming. Check the sweep and threshold again. I have seen repairs fail because the gap was measured with the door tilted. That mistake is easy to make. Avoid cutting when hinge adjustment or threshold correction solves the problem. A slightly imperfect gap may be safer than an over-trimmed door that admits rain, insects, and cold air.

Trim the Door Bottom with a Circular Saw or Track Saw

Trimming an exterior door bottom can stop scraping on a new threshold or uneven floor. Remove the door from its hinges and place it on padded supports. Measure the gap at several points, because floors are rarely perfectly level. Leave about 6 to 8 millimeters of clearance beneath the door. Too much space can weaken weather protection.

Mark the cut line across the bottom with a sharp pencil and a square. Clamp a straightedge firmly for a circular saw, or guide a track saw along the mark. Set the blade depth only slightly deeper than the door material. This reduces splintering and prevents accidental damage to the supports. Cut slowly with the finished side facing upward when appropriate for the door construction. A fine-tooth blade usually leaves a cleaner edge. Wear eye and hearing protection.

I have found that rushing the final few centimeters causes most rough cuts. Pause before reaching the end, then support the offcut carefully. Lightly sand the edge and seal exposed wood with a suitable exterior coating. If the door contains metal, fiberglass, or a foam core, confirm that it can be trimmed before cutting. Some doors need a replacement bottom rail instead. Rehang the door and check the sweep, latch, and threshold contact. My first measurement is not always perfect, so I test the fit before removing more material.

7 Best Ways to Trim Under an Exterior Door? - Trim the Door Bottom with a Circular Saw or Track Saw
Trimming Method Best Use Typical Material Removal Recommended Tools Main Advantages Important Limitations Finish and Safety
Circular Saw with a Straightedge Fast, straight cuts on solid-wood or wood-core exterior doors when the door is removed and supported securely. About 1/16–1/4 in. per trimming operation; measure the required clearance before cutting. Circular saw, fine-tooth blade, clamps, straightedge, tape measure, and a scribing tool. Quick, widely available, and capable of producing a clean full-width cut when the guide is clamped correctly. More difficult to control than a guided saw; cutting while the door is hanging can damage the jamb, threshold, or floor. Clamp the guide firmly, cut from the less-visible face when appropriate, and seal any exposed wood immediately.
Track Saw Long, highly accurate cuts where a precise, splinter-resistant edge is important. About 1/16–1/4 in., depending on the required threshold clearance and door construction. Track saw, guide rail, fine-finish blade, clamps, and support blocks. The guide rail keeps the cut straight and helps reduce wandering, making it the most controlled power-saw option. Requires suitable equipment and a stable work surface; the guide rail must be positioned accurately before cutting. Use eye and hearing protection, keep the blade clear of supports, and apply exterior-rated sealant or paint to the cut edge.
Oscillating Multi-Tool Small localized adjustments, notches, or trimming around a threshold when only a limited amount must be removed. Usually less than 1/8 in. at a time; best for small sections rather than a long full-width cut. Oscillating tool, flush-cut or wood-cutting blade, guide block, pencil, and sanding pad. Offers excellent control in tight spaces and creates less kickback risk than a large rotating blade. Slow for a complete door-width cut and more likely to leave an uneven edge without careful marking and sanding. Make several shallow passes, keep the blade square to the door, and smooth the edge before sealing it.
Jamb Saw or Fine-Tooth Handsaw Low-cost trimming when power tools are unavailable or when a quiet, controlled cut is preferred. About 1/16–1/8 in. per controlled pass; suitable for modest adjustments. Jamb saw or fine-tooth handsaw, combination square, marking knife, and sanding block. Inexpensive, portable, and easy to use for small corrections without generating power-tool dust. Requires more time and physical effort; maintaining a perfectly straight cut across a wide door can be challenging. Score the cut line first, use short strokes, support the door securely, and avoid cutting through hardware or embedded components.
Block Plane or Low-Angle Plane Fine adjustment after a saw cut or removal of a very small amount from a solid-wood door bottom. Approximately 1/32–1/16 in. per series of passes; intended for final fitting rather than major removal. Sharp block plane, marking gauge, straightedge, and sanding block. Provides excellent control and a smooth edge while removing material gradually. Works poorly on hollow-core doors, metal skins, fiberglass, and many composite doors; a dull blade can tear wood fibers. Plane with the grain where possible, check the fit often, and coat the exposed end grain against moisture.
Belt Sander or Random-Orbit Sander Refining a slightly oversized cut or correcting minor unevenness along a solid-wood bottom edge. Generally less than 1/16 in. for controlled finishing; avoid using sanding as the primary method for large removal. Belt sander or random-orbit sander, medium and fine abrasive discs, sanding guide, and dust collection. Useful for smoothing saw marks and blending a small amount of material across the full width. Can quickly remove too much material or create a rounded, uneven edge; abrasive dust requires careful containment. Use light pressure, keep the sander moving, wear respiratory protection, and seal the finished edge.
Table Saw with a Crosscut Sled Repeatable, square trimming of a removed solid-wood door when the door can be supported safely and the saw has adequate capacity. About 1/16–1/4 in.; the exact amount should be marked from the required finished clearance. Table saw, crosscut sled or secure guide, fine-tooth blade, featherboards, and outfeed support. Can produce a very straight and square cut with consistent results on suitable wood doors. Large doors are difficult to handle safely on a table saw; kickback and loss of control are serious risks without proper support. Use two-person handling when needed, keep hands away from the blade, and never force an unstable door through the cut.
Measurement and material note: The finished gap under an exterior door is commonly around 1/8–1/4 in., but the correct clearance depends on the threshold, weatherstrip, door sweep, floor level, and manufacturer instructions. Measure at both jambs and across the threshold before trimming. Solid wood can usually be cut and resealed; steel-skinned, fiberglass, foam-core, and composite doors may have restricted trimming limits, so verify the door construction before removing material.

Remove Small Amounts with a Plane, Belt Sander, or Router

When an exterior door rubs against the threshold, remove only the wood causing the problem. Measure the gap with a ruler, then mark the door with a sharp pencil. A hand plane gives the cleanest control for small adjustments. Keep each pass light and check the fit often. Do not rush it.

A belt sander removes material quickly, but it can create a hollow edge. Use short passes and keep the tool moving. Sand with medium grit, then finish with finer paper.

A router works well when the bottom edge needs to stay straight. Clamp a guide securely, set a shallow cutting depth, and make several passes. Never remove the full amount in one cut. That mistake is easy to make.

Other useful methods include a sharp chisel, a block plane, a sanding block, and a fine-tooth handsaw for larger corrections. Protect the door surface with masking tape before marking. Support the door firmly, and wear eye protection during powered work. I sometimes find that my first measurement is wrong, especially on uneven floors. Recheck the hinge side, latch side, and threshold before cutting. After trimming, seal the exposed end grain with suitable exterior coating. Moisture enters there first. A small remaining rub is safer than an oversized gap.

Cut Complex Door Materials with a Jigsaw or Oscillating Tool

Trimming an exterior door requires more than removing a few millimeters. The correct tool depends on the door’s skin, core, and bottom seal. For solid wood, a jigsaw gives a straight, controlled cut with a sharp, fine-tooth blade. Clamp a straightedge as a guide. That small step prevents wandering. For fiberglass, composite, or layered doors, use a carbide-grit blade at moderate speed. Cover the cut line with painter’s tape, then mark both faces carefully. Measure twice.

An oscillating tool works better for tight corners and localized trimming. Use it when the jamb blocks a jigsaw base or when only one corner needs adjustment. Keep the blade square to the bottom edge. Short passes create less heat and reduce splintering. For a metal-skinned door, select a blade rated for thin metal and inspect the core before cutting. Do not cut through reinforcement, wiring, or hardware.

Remove the door and support it on padded sawhorses. Secure it firmly.

Eye protection, hearing protection, and a suitable dust mask matter with fiberglass or composite dust.

Leave the weather seal and threshold untouched until the door swing is tested. After cutting, sand the edge lightly and seal exposed wood against moisture. On my first attempt, I removed too little and repeated the setup. It was slower, but safer than guessing. Test-fit the door before installing the bottom seal. Small gaps become obvious in wind and rain.

Seal, Rehang, and Test the Exterior Door for Proper Clearance

Trimming an exterior door starts with measurement, not guesswork. Check the gap above the threshold and inspect the hinges for sagging. A door may rub because it has dropped, not because its bottom edge is too long. Mark the tight area with a pencil. Remove the door carefully, keeping the hinge pins and screws together. Small details matter.

Use a straightedge to mark a level cut, then trim only the necessary amount. A hand plane gives better control than removing too much with a saw. Sand the fresh edge until it feels smooth. Wear eye protection. I once cut too aggressively near one corner, leaving an uneven gap that needed extra sanding. That mistake was avoidable.

Seal the exposed wood before rehanging the door. Apply a suitable exterior coating to the trimmed edge, especially near the threshold. Refit the door, tighten loose hinge screws, and check that the slab sits square in the frame. Test the swing several times. The bottom should clear the threshold without scraping. Close the latch gently and inspect the weather seal for even compression. Slide a sheet of paper around the closed door; firm resistance suggests a useful seal, while a loose section may need hinge adjustment or additional weatherstripping. Open and close the door again after the coating dries. Temperature and humidity can change the fit slightly.

Top